Make Your Own Ceremonial Arrows January 30, 2009
Posted by jeffcummings in Uncategorized.Tags: Arrows, Boy Scouts, Craft Helps, Cub Scouts, Scout Leaders, Training, Webelos
4 comments
Hello fellow Scouters,
Scouting has a great connection with Native American culture. And since many ceremonies involve arrows, as a Cub Scout leader you are eventually going to need to get some arrows. You can go out and spend $12 – $15 or more on an arrow, but here’s a way to make arrows that look good and cost a lot less money.
Here are the supplies you will need:
Wood shaft – I used 7/16″ wood dowels I purchased at the craft store. It’s important to choose dowels that are as straight as possible. If they have any bow to them, make sure it’s not in the middle. If it bows at either end you can cut that out when you cut them down to size. These cost $0.99 each.
Arrowheads – I paid $1.12 each for these, from a local store that 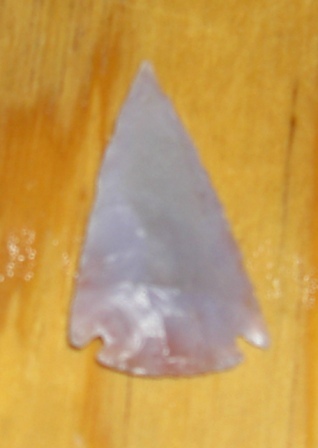 has all sorts of Native American items (it’s actually called the Indian Store, in Escondido, CA). When selecting them, choose the thinnest you can. (These can be purchased fairly inexpensively on-line, but you won’t be able to look at them first). I purchased stone arrowheads, but you can also buy them in metal or wood. Just be careful if kids will be handling them.
Feathers – I purchased full-length black-dyed turkey feathers from the Indian Store. They cost me around a buck and a half each. I bought one for each arrow I was going to make.
Here’s how to make your arrows:
Step 1 – Cut wood shaft – As I mentioned previously, you cut any bend out of the wood dowel if it’s at the end. When making your own arrows, you can cut them to the length you want. I cut my shafts to 25″, to fit a 30″ plaque (with room on either side of the arrow).
Step 2 – Notch both ends of wood shaft – I had a deeper notch on the end where the arrowhead would go. I measured the thickness of each arrowhead and made the notch on all the shafts to match the thickest arrowhead. I used my band saw for this, but you can use a small craft saw or a hack saw to make this cut. I drilled a hole in the dowel first where the notch would end. Then I cut the notch to this drilled hole.
Step 3 – Stain wood shaft – I had left over stain and gloves from a 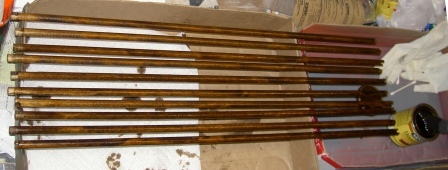 prior Scout project, so I didn’t have to buy this. I put two coats of stain on each shaft, using a cardboard water bottle case to catch any dripped stain, as I blogged about previously. I used a cotton swab to stain in the notchings.
Step 4 – Prepare feathers – I cut the feathers into thirds, all of 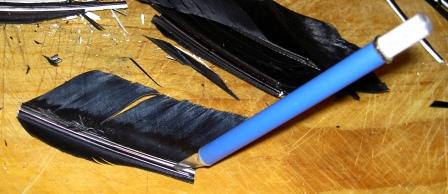 equal length. Since all the feathers had the same basic shape, I grouped the feather sections based on where they were before I cut them (i.e. all the sections from the middle of the feather were grouped together). This way each arrow had the same feather shape. I then had to cut down the shaft of the feather with a hobby knife, since it was too thick for use on an arrow.
Step 5 – Attach arrowheads – I used a hot glue gun to glue the 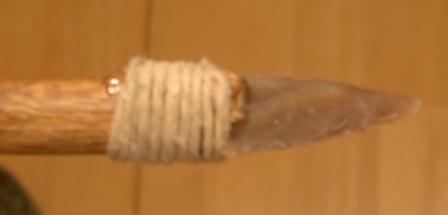 arrowhead into the notch. Then I had cord that I wrapped around the arrowhead using a whipping knot. This cord hid the notch hole. I put a dab of glue where the whipping knot went under the wrap, to keep it from unraveling. (Since this was a ceremonial arrow, this way is more for decoration. If you were to make an arrow you would shoot, I’d recommend stronger glue and a sinew wrapping).
Step 6 – Attach feathers – I shaved off a small section of feather at 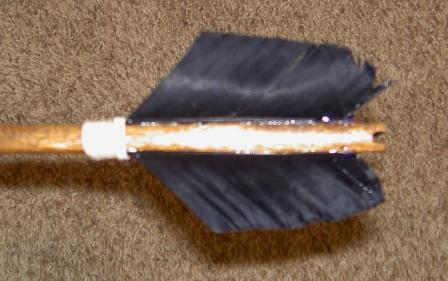 the top of the feather shaft, so I could later wrap it to the wood shaft. I then put a thin bead of hot glue along the feather shaft to attach it. When attaching the first feather, lay the arrowhead down and have the arrowhead horizontal. The first feather will point directly upwards. After all three feathers were attached, I wrapped the feathers as I did with the arrowhead, using a whipping knot. This will hold it on the shaft, and will hide where the feather is attached to the shaft. (Sorry the picture came out a bit blurry).
–
Cost – I had the stain, foam brushes, and gloves already in my den supplies, so I didn’t have to purchase them for this project. I made 10 arrows this past month for my boys’ Arrow of Light career arrows. It cost me $4.06 after tax for each arrow (sorry for the exactness – I’m an accountant after all). Since I made 10 arrows, this was a savings of $70 – $100 vs. purchasing these arrows already made. Since we are almost out of den dues, this was a great way to go. (Even if we weren’t out of den dues, this makes sense to do).
What I would do differently – I wish I had wrapped the far end of the feathers. I think this would have looked better. Also, in the end I wasn’t too happy with the arrowheads I chose. They were a little small, and didn’t stand out too well apart from the wood shaft. Neither of these affected the look of the arrow too much, though. I was pleased with how they came out.
–
So here’s a way to make your own arrows for whatever ceremony you have coming up. And if you are willing or able to put the time commitment into making them, you can make good looking arrows and save quite a bit of money. A Scout is Thrifty!
In Scouting,
-Scouter Jeff <><
